
Last weekend I took the time to re-watch the New Yankee Workshop Miter Bench and Storage and Workshop Hutch videos. Norm's layout for his hutch was one small drawer over two large drawers which may have served him well - the video also shows him with a wheelbarrow full of routers - but when he made his Miter Bench and Storage he made a lot of different storage choices. For example he made a tray to store his spindle sander on. Since it is one large tool it doesn't really need full sides, a shorter sided tray works fine.
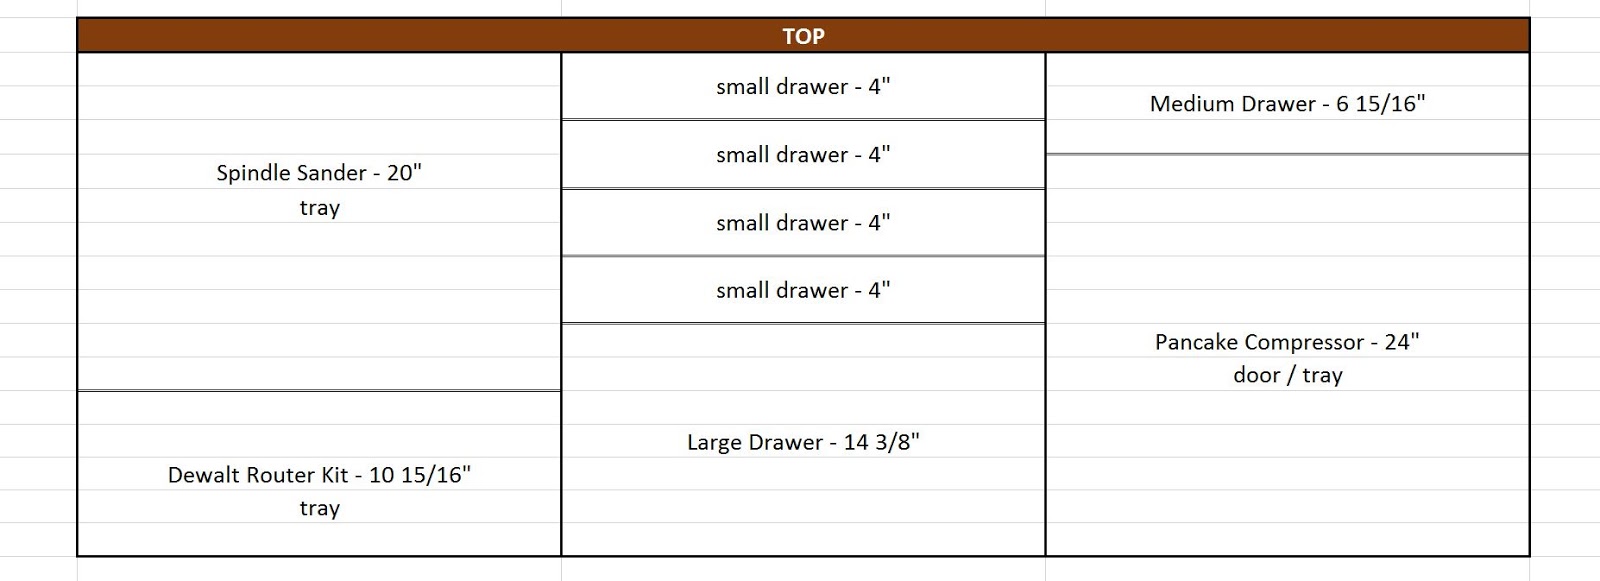
In my diagram above you can see that I've named the contents of some of my drawers. I'm going to follow Norm's example and put the spindle sander on a tray in the top left spot. I've got a Dewalt multi-base router combo kit that is in a pretty large custom box. I'm going to put a tray in the bottom left of the bench to hold that.
The bottom of the right compartment is going to be storage for my compressor. I'm waffling between putting it on a tray and just setting it on the floor. I think I'm going to try it on the floor first but give it enough height that I can put a tray in later. One of the things I was thinking was plumbing the shop with piping for compressed air. When I started thinking this the only way to do it was to use copper pipes. There's a new product that is much easier to install. This isn't an immediate plan; however, once I get the shop plumbed I can just leave the compressor in place. I might even run a line into the garage so I can get compressed air out there too.
The rest of the bench is going to be drawers.
On Norm's miter saw bench he added a bunch of shallow drawers to one of the compartments. I like this idea since I have a lot of things sitting on shelves that could be transferred to a shallow drawer very easily and would be stored more efficiently.
Norm used half blind dovetails for his drawers. These joints are very strong and can be made quickly with a half blind dovetail jig. Unfortunately I don't have one. I do have a very nice Leigh D4 Dovetail Jig which I may decide to use. I have to admit, I haven't really learned how to use it yet. It is a little more complicated than most half blind jigs. If I had the time this would be the perfect excuse to learn how to use it. More likely I'm going to just use a locking rabbet joint. It's a pretty strong joint and I can cut it quickly and easily on my table saw. Maybe I'll pull the manual out and give the dovetails a whirl.
Anyway I think I have my layout. I still need to come up with a cut list for the drawer and tray parts. That'll depend slightly on how I am going to join the drawers but I should still be able to get most of it figured out.